What is a Georeferenced 3D Model?
A georeferenced 3D model is a digital representation of the real world, where the model's coordinate system is aligned with real-world geographic coordinates. This alignment allows for accurate measurements and analysis, making it possible to compare the model directly to physical structures or environments. The process involves transforming real-world coordinates into a digital format that reflects true scale and spatial relationships.
When georeferenced, this 3D point cloud provides a scale and can be measured compared to reality
This technology is incredibly valuable because it enables users to analyze and inspect real-world structures such as mines, wind turbine pillars, or buildings. It helps in planning, monitoring, and decision-making by offering precise spatial data that can be used across various industries.
The advantages of a georeferenced 3D model include:
- Enhanced decision-making through accurate spatial data
- Identification and assessment of structural damage
- Accurate location and measurement of specific areas
- Quantification of materials, such as stockpile volumes
- Ability to merge multiple point clouds using common reference points
How to Create a Georeferenced 3D Model with the Elios 3
The Elios 3, a specialized drone designed for confined spaces, is capable of capturing georeferenced data that can be transformed into a 3D model. This is achieved by using a LiDAR scanner to collect millions of points as the drone moves through an area, which are then processed into a detailed point cloud.
If the data collection with the Elios 3 is done properly, these point clouds can be accurately georeferenced, matching real-world measurements and features closely.
![2023-09-15 15_02_37-CloudCompare v2.13.alpha (May 16 2023) [64-bit] - [3D View 1]](http://bsg-i.nbxc.com/blog/efd5f8af2ac9b1156df28d3bf37cea0f.png) A point cloud of a carpark where the points show clear outlines of motorcycles and bicycles
A point cloud of a carpark where the points show clear outlines of motorcycles and bicycles
Step-by-Step Guide
Step 1: Site Preparation
The georeferencing process begins as soon as you arrive at the site. Make sure there are no hazards that could interfere with your flight, such as water or low-hanging cables. If needed, place retroreflective targets around the area. These targets are essential for aligning the point cloud with real-world coordinates. For best results, use at least six targets placed at different heights and avoiding symmetrical arrangements.
Step 2: Georeferencing the Targets
To georeference the targets, use a total station to record their absolute positions in a local or global coordinate system. This data is crucial for aligning the point cloud accurately. Export the data as a CSV file, which can then be used during post-processing.
Here you can see a surveyor georeferencing the retroreflective targets that come with the Flyability Surveying Payload
Step 3: Taking Flight
Now it’s time to fly the drone! While the Elios 3 is collision-tolerant, it’s important to avoid any collisions when collecting georeferenced data. Fly in mapping mode with assistance enabled, and perform a 15-second calibration before takeoff. Once airborne, perform a 360-degree rotation over the takeoff area, and repeat this each time you pass a target. Keep the flight smooth and avoid erratic movements to ensure accurate data capture.
An example Elios 3 flight plan with rotations in place, shown in blue
When landing, return to the takeoff point and complete another 360-degree rotation. Landing within 1 meter of the starting point ensures that the flight path is "closed," making it easier for the software to process the data accurately.
Step 4: Processing the Data
Once the flight is complete, export the data via FlyAware as usual. Use FARO Connect for post-flight processing. This software includes pre-settings tailored for the Elios 3, including processing templates and environment-specific configurations. Selecting the right settings helps optimize the processing of your dataset.
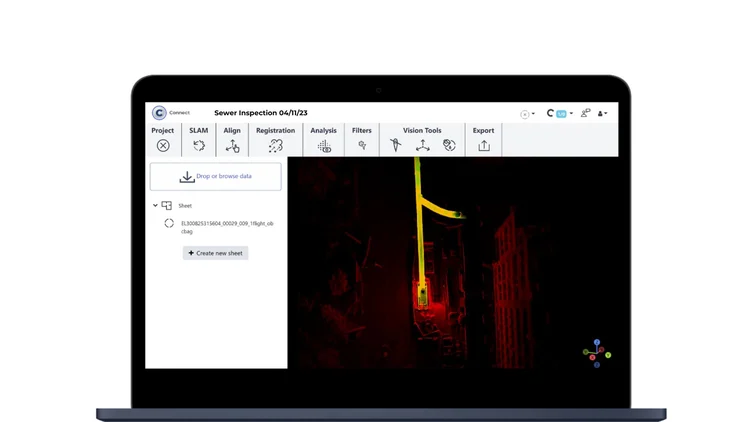 FARO Connect is tailored to support processing datasets from the Elios 3
Next, register the retroreflective targets so that the software knows their exact coordinates. This step automates the localization and georeferencing of the entire model, ensuring accuracy throughout the dataset.
For more details on the steps involved, refer to Flyability’s training materials for FARO Connect. Following this guide will help you create high-quality, georeferenced *.las files that can be used for further analysis or integration into other systems.
What's Next: Uses for 3D Models
Once your 3D model is georeferenced, you can use it for analysis or export it as a .las file. It can be integrated into CAD software or specialized tools that handle georeferenced data. This makes it ideal for asset management, maintenance planning, and new installations.
Here are two different point clouds that were merged through georeferencing by using common key points (targets)
Georeferenced 3D models are a powerful tool for surveyors, providing accurate insights for maintenance, planning, and asset management. Their applications span many industries, such as infrastructure, mining, and urban development. Some examples include:
- Improving sewer management with safer drone inspections
- Identifying an orepass hangup with the Elios 3
- Measuring stockpiles with a drone
Georeferenced 3D models are just one of the many outputs possible with the Elios 3. To learn how to georeference your point clouds effectively, consider joining training sessions offered by the Flyability Training Team. They provide guidance on advanced data processing, merging flights, and automating georeferencing. For more information about Flyability or training options, feel free to reach out via the contact button on our website.
Customized Card,Custom Christmas Cards,Custom Greeting Cards,Custom Holiday Cards
Jiangmen Yingzhihui Electronic Commerce Co., LTD , https://www.yzhprint.com